Gotta Catch ‘Em All: Design-Build Team Challenge
The purpose of the Pokémon Challenge is to allow students to use the engineering design process while building upon their prototyping and graphical communication skills through hand-sketching, CAD, and manufacturing techniques. Students are tasked to develop a mechanism that will help Professor Oak catch all the Pokémon in the Kanto region to help him fill his Pokédex and further his research. Students optimize their Pokémon catching method and create a design that is creative, aesthetically pleasing, meet Prof. Oak’s grant budget, and be able to catch the rarest Pokémon. Teams of 3-4 engineers are commissioned to develop a machine that could move a mass (the Pokéball) from the Start Zone to the End Zone. Each machine starts from rest and is triggered by a pre-programmed Arduino and servo motor.
Students must optimize a Performance Index which penalizes cost and rewards accuracy, height, and distance from the End Zone. Accuracy is weighed the most followed by height and distance, respectively. Teams that create a unique design or exceed expectations in creativity and aesthetics are awarded a bonus factor.

End Zone: Targets
Primary Learning Objectives
Develop spatial visualization and reasoning skills,
Understand the power and precision of computer-aided modeling,
Construct accurate complex 2D and 3D shapes,
Organize and deliver effective verbal, written and graphical communication,
Apply relevant sketching, 2D and 3D techniques using modern engineering tools in a team-based setting to design parts of a larger system.
Project Requirements

Pokéball
Each machine has to meet certain engineering requirements or risk being disqualified. These requirements are specified in the project documentation but some include that the mechanism must be within an initial dimensional constraint at the start but can extend beyond these dimensions after triggering their mechanism. The Pokéball is not permitted to touch the floor at any time.
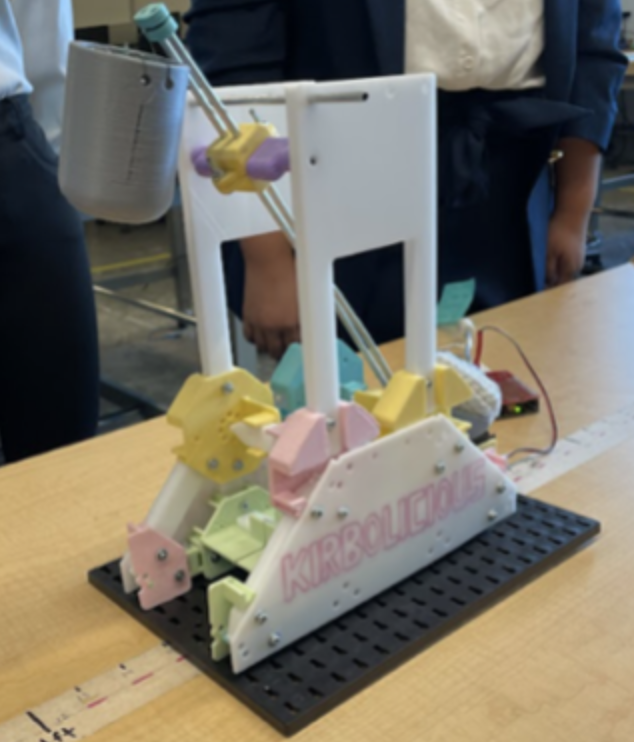
Aside from some of the constraints mentioned above, the project is left very open-ended to allow for creative engineering solutions. While many teams may opt for a simple, rubber-band powered catapult, other teams may create scoping or scissor mechanisms, cannons, and trebuchets. Some teams may choose to incorporate mechanisms to easily adjust the angle and rotation of their launch. Since the instructions only identify the constraints and objectives of the project, students can experience the engineering design process from start to finish.
Project Steps
Each team member develops hand sketches of their initial conceptual design.
Teams evaluate the individual hand sketches, brainstorm together and come up with their proposed design that attempts to optimize the project performance index.
Teams break up their designs into sub-assemblies.
To ensure that every student develops proficiency in SolidWorks and AutoCAD and has experience using both the 3D printer and laser cutter, each team member must design:
At least one sub-assembly in SolidWorks
Their own 2D part in AutoCAD
Their own connection detail.
Teams must assemble all of the sub-assemblies into a master CAD model requiring collaboration between team members during all stages of the design process as their prototypes evolve.
Teams must manufacture their 3D printed parts and 2D laser cut parts and fabricate an initial physical assembly. During this early phase of manufacturing, students learn the challenges of parts fitting together (dimensioning and tolerances), the importance of connection details, and how manufacturing can sometimes go wrong.
Teams test their initial structures during Phase 1 testing to see if they have designed a working mechanism. They also try to interface with the arduino and servo-motor controller which provides the trigger that launches their device.
Teams iterate to make sure their design works and can be triggered by the Arduino and servo-motor mechanism.
Teams compete in a final event where they are provided with three chances for their mechanism to hit the targets and maximize the points they earn.
Milestones and Deliverables
Weekly Team Design Reviews using an Engineering Notebook
Individual hand-sketched drawings to support project brainstorming
Working physical mechanism
Final Project Construction Drawing Set
Poster
While most teams opted for a catapult or trebuchet mechanism to try to maximize distance from the target and land on the higher tiers in the end zone, some chose innovative scoping designs to try to maximize the accuracy and repeatability of their launches.
Author

Lelli Van Den Einde, Ph.D.
is a teaching professor in Structural Engineering at the UC San Diego and Co-founder of eGrove Education. She incorporates integrated pedagogical innovations into core structural engineering courses; prepares and advises next-generation faculty; advises student organizations; and is committed to activities that broaden the participation of underrepresented groups in STEM.
Comment below to share your experiences of using this exercise in your classroom or contact us to learn more about the project such as materials to purchase, implementation details, etc.